Day 01 :Creating a Blog (Which is this one)

Day 02 : Making Pictogram with using
Adobe Illustrator
Step 01 : Create a new file (Ctrl+N)

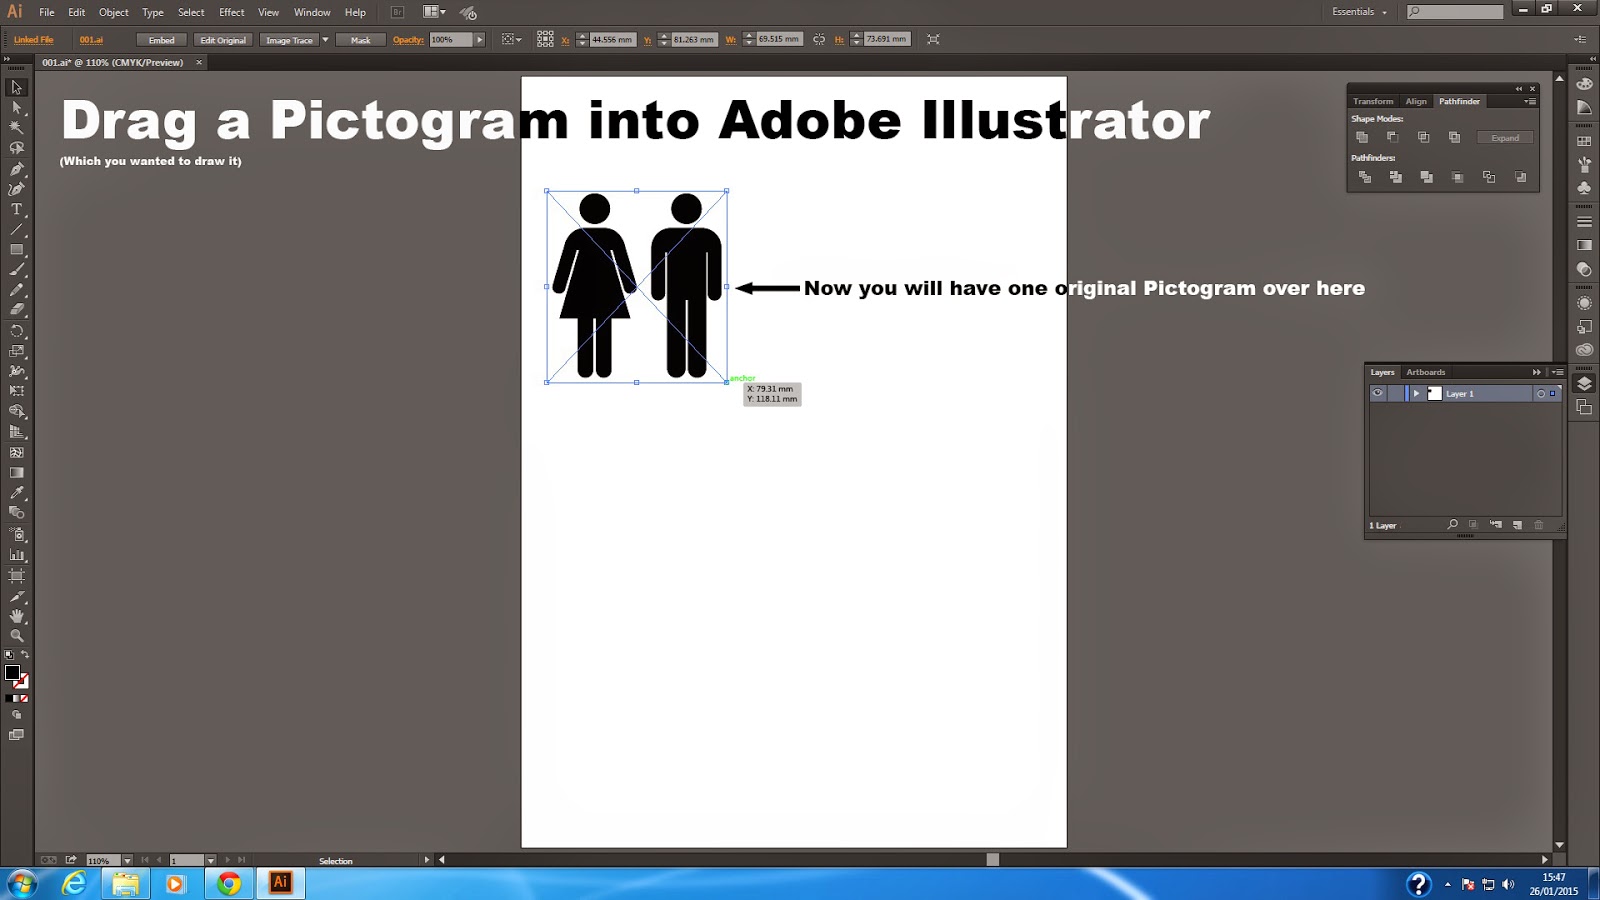
Step 02 : Choose one pictogram which you feel like making it and put it into Illustrator
.jpg)
You can either drag it into the working space or you can open it by pressing (ctrl+O)
.jpg)
Resize the picture to a favorable size for you to start your work
Step 03 : Lock the Original Layer

This can prevent you from working on a wrong layer
Step 04 : Create a New Layer to differentiate your artwork
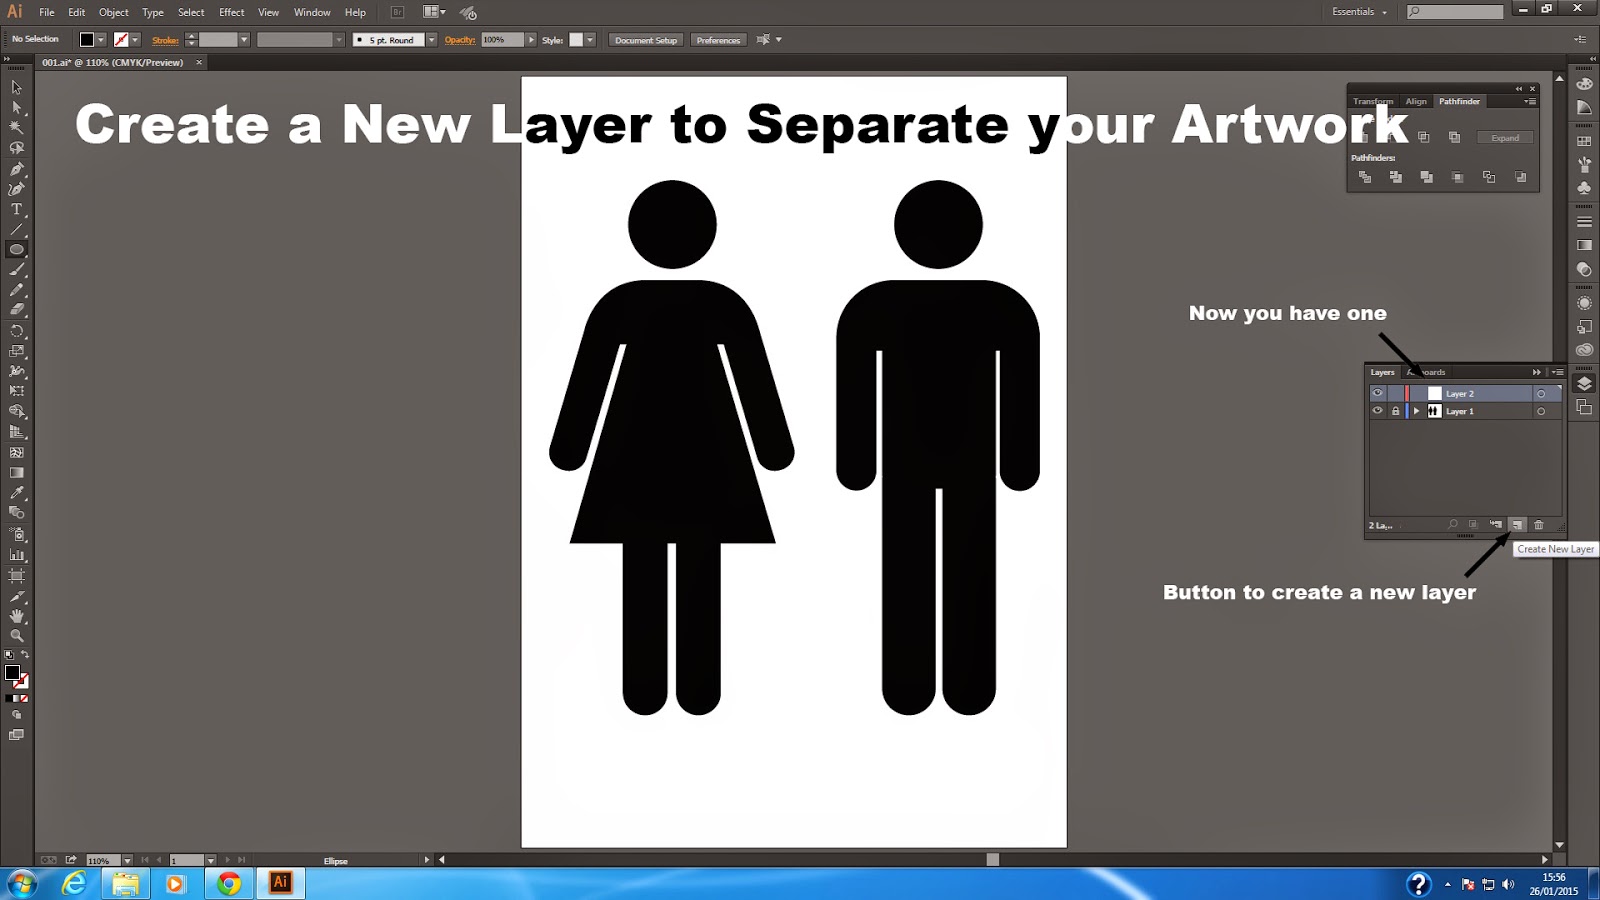
This can prevent you from misdoing you work on the wrong layer
Step 05 : Using the shaping tool to create shapes
.jpg)
First, choose the shape you want to make
.jpg)
Then, use the tool to drag a shape out on the working space
.jpg)
Now you will have a shape you want
Step 06 : Move and resize your shape to fit the design
.jpg)
Using the selective tool/direct selective tool to move the shape to the correct place it should be
.jpg)
Using the same tool, maximize or minimize the shape to the size you want
Step 07 : Be creative with the shapes, rounded it, trime it or combine it
Rounding edges
.jpg)
First create a shape, then round the edge
.jpg)
Now you will have the shape you want !
Trimming the shape
.jpg)
First create a shape which represent the area you want to trim, then press the minus front button to trim it
.jpg)
Now you have a clear cut
Combining two shapes
.jpg)
Create a shape which you want to combine it with the previous one, then press unite to combine it
.jpg)
Now you will have a combined shape
Step 08 : Use a pen tool to make shapes that could not be done with shaping tools
.jpg)
Select pen tool (P) and start pointing out the shape you want
.jpg)
After pointing, you will have the shape you want
Step 09 : Repeat Step 4 to Step 8 to make a perfect pictogram out of it!


ARTWORK

ORIGINAL


ORIGINAL


My Pictogram Artworks, ENJOY!
Thank You Very Much, Leave a comment for my improvement
^U^
Day 03 : Making Logos with using
Adobe Illustrator
Adobe Illustrator
Step 01 to Step 04 pls refer to "Day 2"
Step 05 : Make the colours out first
Step 06 : Move the colours away so that it won't block your vision
Step 07 : Now draw the Base shape out
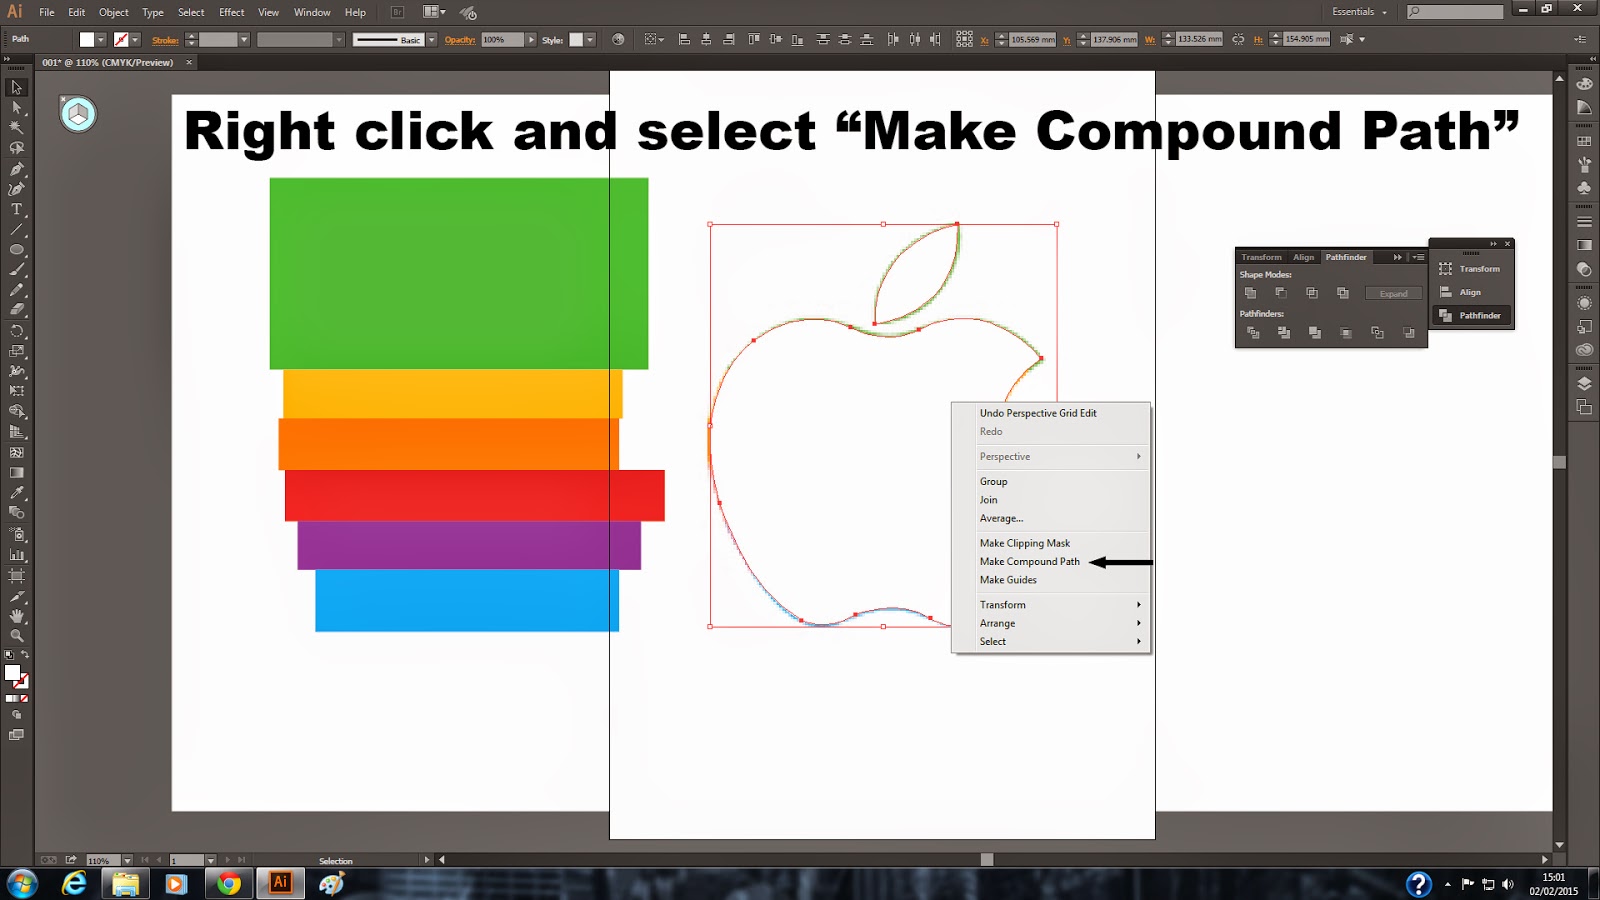
Step 08 : Now make the base shape in 'One Piece' so that the next step can be carry on
Step 09 : Now move the colour back to the place
Step 10 : Mask it to the base shape
Step 11 : Done!
ORIGINAL
ARTWORK
ORIGINAL
ARTWORK
ORIGINAL
ARTWORK
Day 04 : Making Polygon Art with using
Adobe Illustrator
Step 01 : Choose a Pic, drag it into AI and Resize it
Step 02 : Adjust the artboard to a Favorable size
Step 03 : Always Lock the Original Layer
Step 04 : Create a New Layer
Step 05 : Create a Background and Lock it
Step 06 : Close the Visibility of the Background if you do not need it first
Step 07 : Create a New Layer to start your work
Step 08 : Like the Previous Task, Use Pen Tool to trace out Shapes
Step 09 : Colour It!
Step : Repeat Step 08 & 09 until you finished it
ORIGINAL BY ABHISHEK AGGARWEL
ARTWORK BY ME
Day 05 : Using Brush Tools in
Adobe Illustrator
Step 01 - Step 07 pls refer the previous post, DAY 04
Step 08 - Select Eyedrop Tools to select the colour
.jpg)
.jpg)
Step 09 - Now select the Brush Tools

Step 10 - Change the size of Stroke

Step 11 - Change the Style
(Width Profile)
%2B(Width%2BProfile).jpg)
(Brush Defination)
%2B(Brush%2BDefination).jpg)
Step 12 - Now Using Brush Tools to make a Base out of it
.jpg)
.jpg)
Step 13 - Add on Details

Step 14 - Repeat Step 08 - 13 until you finish your artwork

Step 01 - Step 07 pls refer the previous post, DAY 04
Step 08 - Select Eyedrop Tools to select the colour
Step 09 - Now select the Brush Tools
Step 10 - Change the size of Stroke
Step 11 - Change the Style
(Width Profile)
(Brush Defination)
Step 12 - Now Using Brush Tools to make a Base out of it
Step 13 - Add on Details
Step 14 - Repeat Step 08 - 13 until you finish your artwork
ORIGINAL
ARTWORK
No comments:
Post a Comment